The dreamy photo editing style is changing how photographers present their work online. If you want your portraits to stop the scroll, this is the look you need. From Kodak Portra color grading to silky bokeh and golden-hour warmth, this guide breaks down every technique step by step. Whether you are a beginner or a working photographer, you will walk away knowing exactly how to achieve this soft, cinematic aesthetic.
What Is the Dreamy Photo Editing Style?
The dreamy photo editing style is a visual approach that makes portraits feel warm, nostalgic, and emotionally rich. It pulls from vintage film photography, high-end fashion campaigns, and cinematic color science.
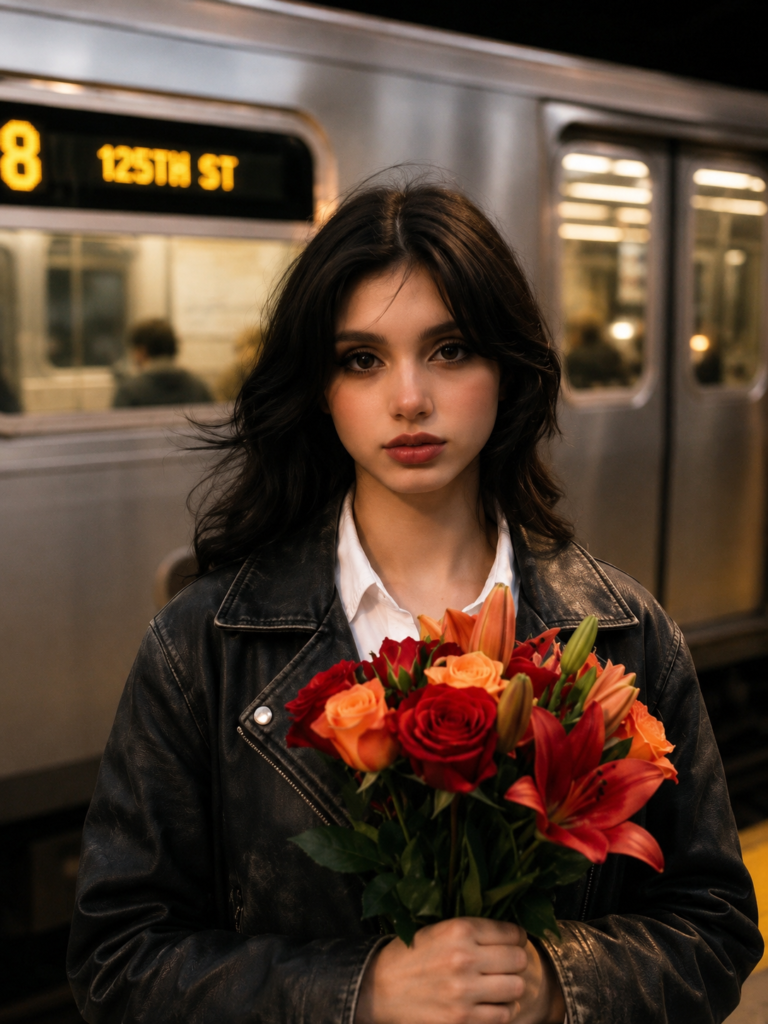
Instead of sharp, high-contrast images, this style uses soft light, lifted shadows, muted tones, and creamy background blur. The result looks like a memory rather than a photo.
Top photographers and content creators use this style because it connects with viewers on an emotional level. It feels personal. It feels cinematic. And it performs extremely well on Instagram, Pinterest, and editorial platforms.
Key Elements of the Dreamy Photo Editing Style
To master the dreamy photo editing style, you need to understand its core building blocks. Each one plays a specific role in the final look.
Only Prompt You Need.
“Transform this photo into an ultra-dreamy cinematic fashion editorial portrait. Create a soft ethereal glow with strong lens diffusion, blooming highlights, creamy bokeh, shallow depth of field, warm golden-hour tones, subtle film grain, soft haze, low contrast shadows, and delicate skin smoothing. Add natural wind-blown hair movement and slight motion blur to create an emotional nostalgic atmosphere. Background should melt into dreamy blur with glowing lights and cinematic depth. High-end magazine photography, vintage film aesthetic, romantic mood, soft focus, luminous skin, muted colors, dreamy bloom, Kodak Portra inspired color grading, editorial fashion campaign, shot on 85mm lens at f/1.2, ultra realistic, premium photography, atmospheric storytelling. Write an artivcle for this prompt to be posted on my website for dreamy effect.“
1. Kodak Portra Color Grading
Kodak Portra color grading is the heartbeat of this aesthetic. The Portra film stock is famous for rendering skin tones with warmth and depth. In digital editing, you replicate this by lifting shadows toward amber, pushing highlights into cream, and keeping midtones soft and golden.
In Lightroom or Capture One, start by pulling the blacks slider up slightly. This lifts your shadows off pure black and creates that iconic film look. Then warm your white balance to somewhere between 5800K and 6500K. Finally, add a subtle orange tint to your shadows in the HSL or color grading panel.
2. Bokeh Background Blur
Bokeh background blur is what separates the subject from the background and gives the image its cinematic depth. The best way to achieve real bokeh is to shoot at a wide aperture, ideally f/1.2 to f/1.8 on an 85mm lens.
In post-processing, you can enhance existing blur using Lightroom’s Masking tool or Photoshop’s Lens Blur filter. The goal is smooth, round circles of light in the background, not distracting geometric shapes.
3. Golden Hour Photo Effect
The golden hour photo effect mimics the warm, directional light that appears just after sunrise and just before sunset. This light is soft, flattering, and emotionally evocative.
To recreate it in editing, increase the warmth of your image and add a subtle yellow-orange overlay to the highlights. Use the radial filter to simulate directional light hitting your subject from one side.
4. Soft Focus and Lens Diffusion
Soft focus gives the dreamy photo editing style its signature glow. It slightly softens fine details while keeping the overall image readable. This is different from blur. The image still looks sharp at first glance.
In Photoshop, duplicate your layer and apply a Gaussian Blur of 3 to 5 pixels. Set the blended layer to Screen mode at 20 to 30 percent opacity. This creates a natural lens diffusion effect that feels organic, not over-processed.
5. Film Grain Effect
The film grain effect adds analog texture to a digital image. It breaks up the sterile smoothness of digital sensors and makes the photo feel like it was shot on actual film.
In Lightroom, add grain using the Effects panel. Set grain amount between 20 and 35, size around 25, and roughness at 50. Keep it subtle. You want to feel it, not see it.
6. Blooming Highlights
Blooming highlights allow bright areas of the image to glow slightly beyond their edges. It creates the impression of light spilling naturally into the frame.
Apply this by painting a soft white dodge brush over your brightest highlights in Photoshop. Alternatively, use the Radial Filter in Lightroom to overexpose highlight zones with a feathered edge. This technique works especially well on hair, skin highlights, and background light sources.
How to Apply the Dreamy Photo Editing Style Step by Step
Follow this workflow to achieve consistent results across every portrait you edit.
| Step | Action | Tool |
| 01 | Set white balance to warm (5800-6500K) | Lightroom / Capture One |
| 02 | Lift shadows, lower contrast | Tone Curve Panel |
| 03 | Apply Portra-style color grade | Color Grading Panel |
| 04 | Add soft glow via lens diffusion layer | Photoshop (Screen blend mode) |
| 05 | Apply subtle film grain | Lightroom Effects Panel |
| 06 | Smooth skin, enhance bokeh blur | Photoshop / Luminar Neo |
Best Software for the Dreamy Photo Editing Style
You do not need expensive tools to achieve the dreamy photo editing style. Here are the best options at every level.
- Adobe Lightroom Classic: Best for color grading, film grain, and global adjustments. The Kodak Portra presets available on sites like Mastin Labs are industry standard.
- Adobe Photoshop: Best for lens diffusion layers, bokeh enhancement, and skin retouching.
- Luminar Neo: Best for beginners. The AI bokeh and glow tools make this style accessible with minimal technical knowledge.
- Capture One: Best for professional skin tone rendering. Its color editor gives fine control over hue, saturation, and luminance.
- Easiest: Gemini or ChatGPT
Dreamy Photo Editing Style for Fashion and Editorial Work
The dreamy photo editing style dominates the editorial fashion photography editing world for good reason. Fashion campaigns need images that evoke desire and emotion. Sharp, clinical photography rarely achieves that. Soft light, glowing skin, and cinematic depth create images that feel aspirational.
When editing fashion portraits for editorial use, focus on three things. First, make the skin luminous without making it look retouched. Use frequency separation in Photoshop to smooth texture while preserving natural skin detail. Second, ensure the background enhances the subject. A well-lit background with gentle bokeh circles frames the model beautifully. Third, keep the color palette cohesive. Muted, warm tones across the entire frame create harmony.
The motion blur technique also plays a key role in editorial work. Wind-blown hair captured at 1/60 of a second introduces organic movement into the frame. In post, you can enhance this with a light motion blur applied selectively to hair and fabric. It gives still images a cinematic, living quality.
Key Takeaways
- The dreamy photo editing style combines soft light, warm color grading, and cinematic blur to create emotionally powerful portraits.
- Kodak Portra color grading is the foundation. Lift shadows, warm highlights, and add amber to midtones.
- Bokeh background blur separates the subject and creates depth. Shoot at f/1.2 to f/1.8 and enhance in post.
- Film grain effect adds analog warmth. Use Lightroom’s grain slider between 20 and 35 for best results.
- Lens diffusion and blooming highlights create an ethereal glow that flatters skin and atmosphere.
- Subtle motion blur and wind-blown hair add life to still images and push the cinematic quality further.
- This style works across Lightroom, Photoshop, Luminar Neo, and mobile apps like VSCO.
Frequently Asked Questions
What is the dreamy photo editing style?
The dreamy photo editing style is a soft, warm, and cinematic aesthetic used in portrait and fashion photography. It combines Kodak Portra color grading, bokeh blur, film grain, and lens diffusion to create emotionally nostalgic images.
How do I get the dreamy photo editing style in Lightroom?
Start by warming your white balance to around 6000K. Lift the shadows and blacks to reduce contrast. Apply a Portra-inspired color grade by adding amber to shadows and cream to highlights in the Color Grading panel. Add subtle film grain in the Effects panel. Finish with a slight haze using the Dehaze slider pulled left.
What lens settings work best for dreamy portrait photography?
An 85mm prime lens at f/1.2 is the gold standard for dreamy portrait photography. The focal length flatters the face and the wide aperture creates natural bokeh background blur. If f/1.2 is out of budget, f/1.8 delivers very similar results.
Is the dreamy photo editing style good for Instagram?
The dreamy photo editing style performs very well on Instagram and Pinterest. Its warm tones and soft aesthetic draw attention in feeds dominated by high-contrast images. Consistency in this style also helps build a strong visual brand identity.
Conclusion
The dreamy photo editing style is one of the most powerful ways to elevate your portrait and fashion photography in 2024. It combines Kodak Portra color grading, cinematic bokeh, soft lens diffusion, and warm golden-hour tones into a cohesive look that feels both timeless and emotionally resonant.
Start with your color grade. Build your bokeh. Add your grain and glow. Then refine with skin smoothing and selective motion blur. Each layer adds depth and emotion to the final image.
If you want to offer this style to your clients, consider creating a signature preset that captures your exact interpretation of the dreamy aesthetic. Your clients will come back for it again and again.
Ready to transform your portraits? Start applying these techniques today and share your results. If you found this guide useful, explore our other articles on cinematic editing styles and Lightroom presets for more inspiration.